
Rogue Camp south of the desert received a complete overhaul with the town being rebuilt. The cave to the far west of the entrance remained as did the Wild Warrior spawn by the entrance, otherwise everything was changed.
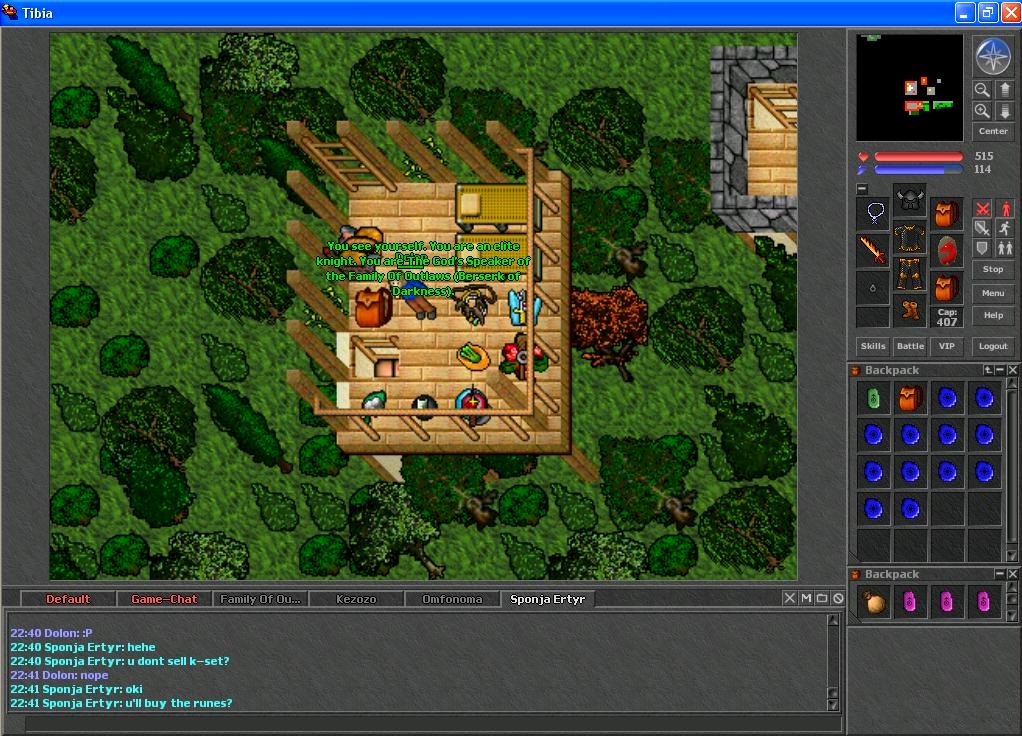
Two three-story observation towers were built to the north and east which could be climbed up. The center of town had a fire pit and platform with a ladder leading to it from the road. A ladder leading down from a shack connected to a bar area to the north with NPC Snake Eyes who sold drinks. Three rentable shops could be found in the east passage, but they were not popular as they didn't have any beds so were often unrented or used as storage for PoH hunts. To the south was five rentable flats and a ladder at either end which would bring you to the surface. Above these flats were three more bunched together. The larger building to the west had NPC HL who was coded by Guido and would refuse to deal with woman, which players detested. Provided you were a male, he would take some of Tibia's hardest to sell items like the Scale Armor that no one else wanted to buy. I made a brisk trade buying these up and reselling to him for a profit. Inside his shop was a rentable apartment and another apartment above. North of this was a three-story treehouse like building which was open like an observation tower.
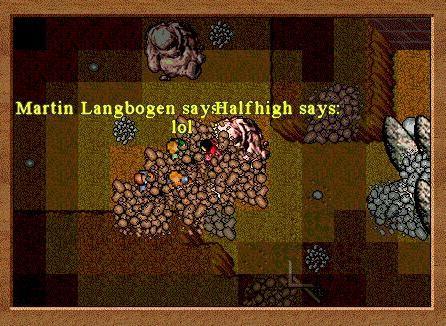
Far south of town in the densely forested area was a guildhall called Outlaw Castle. This was one of my favorite halls and had an interesting design. The surface level was four stone pillars, one of which acted as the entrance to the hall. A ladder took you to the second floor which had access to the rest of the castle. The floor above was an open area which had four towers that had observation platforms on top. Heading down led to a large sleeping quarter and a room which you could hold meeting in. Finally on the lowest level was a small storage area and an exit into the dungeon below which was the halls best feature. Though the hall only had a low 9 beds, the hall was very good for those who liked to train. You could rope up the Rots from the dungeon below which was an underground lake dungeon. If someone came and attacked, you could quickly flee into the hall. I used this to train during the time when mages had gotten too powerful and would deal fatal damage with just their UEs. Strinnity often attacked our training camp and it was not a good time to be training far away from a PZ.
You could even train outside the hall though that wasn't as safe. If trouble arrived, you could use the basement's hidden exit to escape to the south. To do so, you took the dirt tunnel below and headed up past a Scorpion and several Bugs which was surrounded a small pool of water. A ladder in here would take you to a larger lake below which had several Slimes. Or you could follow the path to the west which overlooked the water below and which led to some Spiders. Exiting by ladder would take you to a small hut which was guarded by some Wild Warriors and a fearsome Hunter, so staying inside the hall may have been a better option.
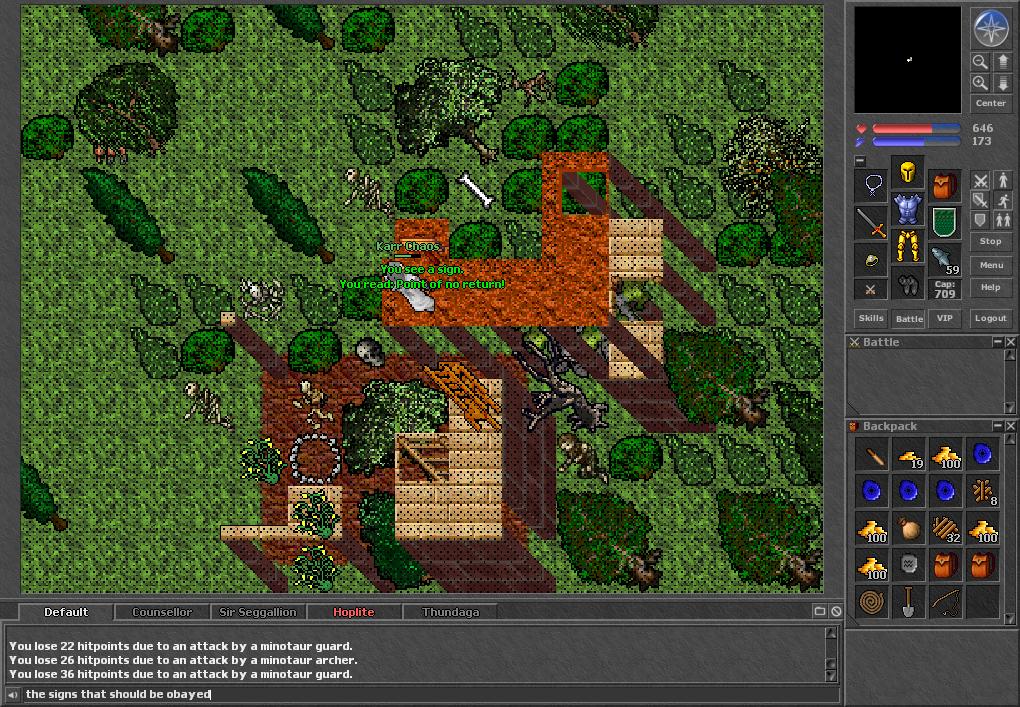
To the southwest was a dilapidated house with a large Mino spawn on the surface. Players liked to hunt the small Mino spawn here and the one east of the desert as you could draw out a couple at a time and make an easy escape if things went south. Once you had cleaned up the spawn you could ascend the ladder and build a parcel step to the next floor, where you would see a hole and a sign. The sign pointedly warned "The point of no return" and it was not kidding. Jumping down the hole dropped you several floors into a den of Poison Spiders. If you were lucky, you would avoid another surprise of this area, the Giant Spider which lived inside. Spiders, Wasps, and Scorpions also made their home in the side rooms so you could find yourself in trouble while facing the hard GS as the lesser creature would prevent you from running the spider like you would in PoH.
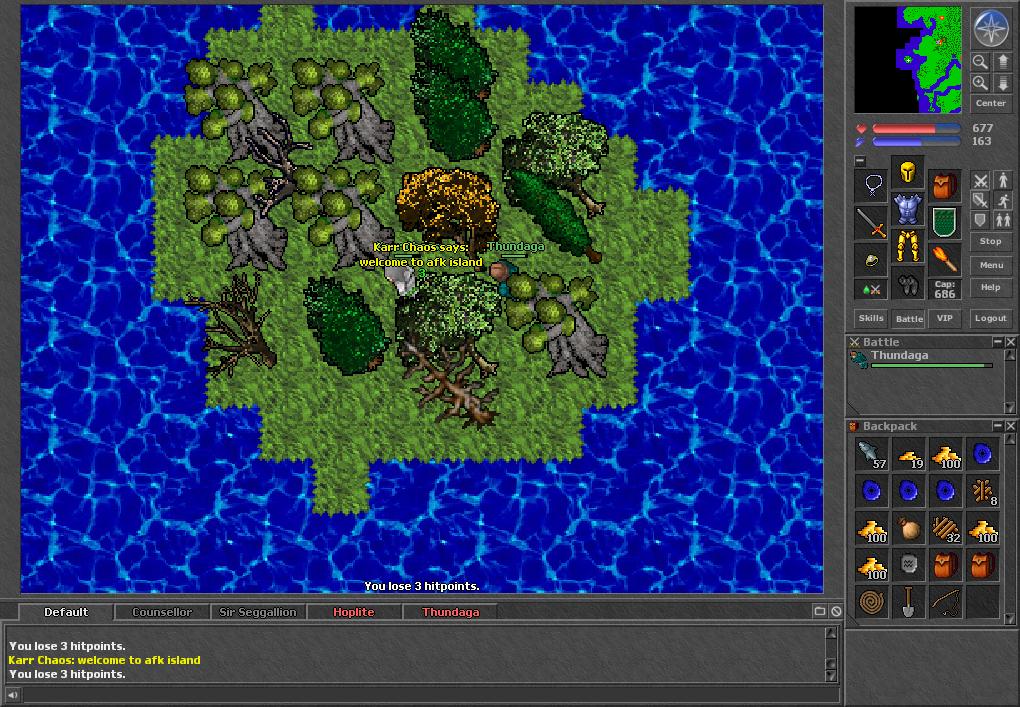
If you headed northwest, you would see a ledge with a floor below you could levitate to. If you didn't have the spell, you would not be trapped here forever, but instead could head south and up a rope spot to the surface. Here was a small island with no creatures which had a daily spawn of three crates in a dead tree. This was AFK island, and it became a very secluded spot to mana gain in secret as few came to this far off place. If no crates were inside, then you would have to wait for them to respawn which I think occurred during a map refresh so you would have to log out and try again in a bit.
Once you made your way down to the floor below you would be attacked by three Orc Berserkers and three Orc Spearman. You had to be very careful they didn't destroy the boxes if you had friends still waiting above to climb down. Once inside the room you could head south and find a single Scorpion which overlooked the underground lake from earlier and you could see the other side of the path.
Heading north would take you to this giant contraption which had a long red wall with a hole in it and a path on the other side leading further up. A room to the west had a table, a switch, and water spots on the ground. Flicking the switch did nothing so without much choice you would head down the hole in the room you dropped into. Immediately upon doing so you would be unable to go back, unless someone stayed behind to rope you. You would see an impassable pile of debris to the north and west, and the north looked like another contraption was there. Without much clue as to how to proceed you could head up the ladder to the south and fight three Cyclops before exiting to the surface. You could make your way back here again if needed.
Without much to go on you might head back to the point of no return and search for some clues. A dead body here would lead you to search and perhaps you would find key 3301 in the dead tree, but you very likely would find yourself down the drop-down hole which took you to a long hall with two locked doors. The key you just found would open the first, but the other door would remain locked. This door required key 3302 which could be found to the north of the point of no return in a dead tree. Opening the last door and heading down the hall took you to a room with a ladder leading up and down. Going up took you way up to an observation tower and heading down took you to the room you saw earlier. There was a second contraption here but no other way to figure out what to do with it.
Though we know the solution as a Power Ring, this was not very clear then. I recall a book in the desert dungeon which alluded to the solution, but it was so vague that you would have to have been very cleaver to figure it out. This ring also spawned in several places in the area but again you would have to keep trying solutions to figure it out. At some point you would figure out that a Power Ring on the counter of the first mechanism would move the wall. The ring would disappear from this location and appear again at the second switch.
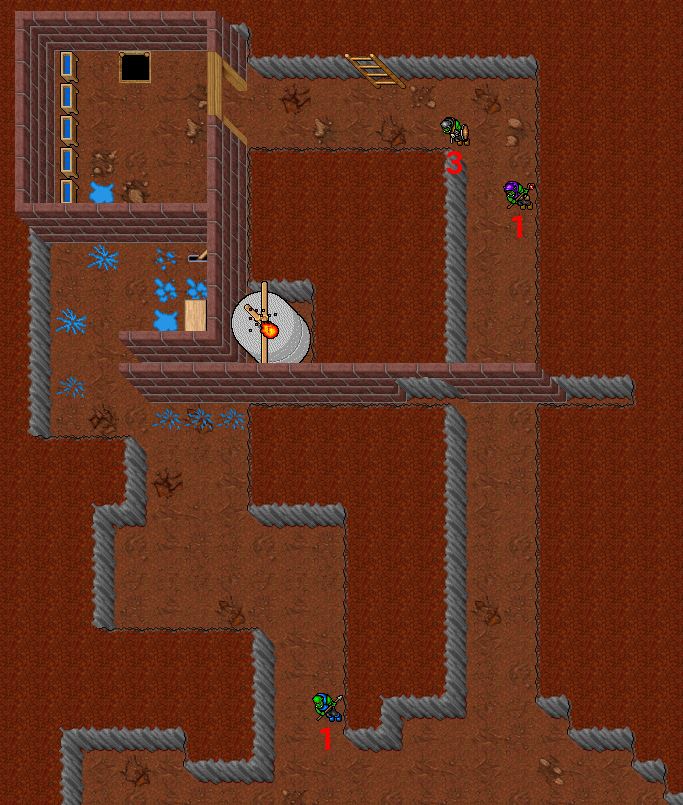
If your friends were still waiting at the contraption you could run through the Hunter hut to the path by the underground lake and chuck the Power Ring across. Getting a power ring was a bit more of a challenge as you had to either loot from one of the few spawns on the map or buy from other players. You could also head back down the Cyclops hole and have your friend rope you back up, otherwise you had to again drop down the point of no return and challenge the GS. Once at the contraption you would toss the Power Ring onto the table and flip the switch and see the wall lurch forward.
On the other side of the wall was an Orc Shaman and Three Orc Warriors. The passage was likely filled with Snakes from the Shaman which was annoying. A ladder on the path would take you up and you might feel tempted to drop down the hole and explore the new area. Unfortunately, this was a one-way trip and jumping down would force you to make your way back up to the surface which was on the edge of the water. Shoveling the loose stonepile would allow you back inside. Annoyed, you might immediately head back to the point of no return, go through the GS, and into the hallway, and instead of taking the path up you would go into the room at the end of the hall and drop down the ladder.
This took you to a large underground house like structure which spawned Skeletons and Ghouls. A balcony like area allowed passage into a large dirt area by an opening to the east which had a couple of Beholders there. Exploring this you would see the contraption from earlier. Heading east down the hall would take you to the red wall from the second contraption but the hall would lead further, and a huge stone blocked your path. You may have noticed a gap in the wall but in your haste to see what was on the other side you might miss it. Rushing back to the second contraption you would see the Power Ring already on the counter and would happily flip the switch. You would have to head all the way back to the other side of the wall. Though the wall was closed, the stone was not moved and there was no way to proceed to the other side. The wall could only be closed once per day so you would have to return another day.
Returning the next day you could now skip most of the steps by heading down to the point of no return, using the Power Ring on the mechanism to access the room. You may have brought more tools to try on this trip, but there really wasn't any indication on how to proceed. Perhaps you would have a flash of insight and try the chair from the previous room by placing it in the wall gap, but upon activating the mechanism you would find it gone and the large rock still whole. The puzzle was blocked for another day, and you would have to try again tomorrow. A trough from the room above would catch your eye on the way out and the next day you would again drop down the point of no return, past the GS, and toss a Power Ring onto the mechanism to open the wall. Using the trough produced the same results as the chair and another day would be lost. The next day you would instead head to the one-way hole and use the junk char to rope you up, perhaps trying some other solution you had thought of. Upon heading to the second mechanism, you would discover your mistake as the wall would firmly block your path. No matter what, you would have to use the Power Ring from the other side to be able to use the second mechanism.
As far as frustrating puzzles go, this one was brutal though some cleaver individuals discovered that if you dropped two rings on the first mechanism then you could activate it twice and try again as the rings is teleported to the second switch, and any leftover rings is teleported back to the first mechanism.
![]() The solution was that a special kind of barrel which you had to drag all the way from PoH to the one-way hole and rope it up, placing it in the gap before activating the second mechanism. Only then would the wall move to crush the boulder. Provided you used the right barrel, (the one on the right here is the wrong barrel) the barrel would survive the ordeal, allowing you to move it out of the way and slip through the opening to the path behind it.
The solution was that a special kind of barrel which you had to drag all the way from PoH to the one-way hole and rope it up, placing it in the gap before activating the second mechanism. Only then would the wall move to crush the boulder. Provided you used the right barrel, (the one on the right here is the wrong barrel) the barrel would survive the ordeal, allowing you to move it out of the way and slip through the opening to the path behind it.
![]() A couple of Skeletons and three Demon Skeletons would attack you as you made your way further in. You would reach a small red room to the north which had a chest inside a stone room with a locked door. Questing in Tibia was never easy, but this would feel particularly galling after finally solving the wall puzzle.
A couple of Skeletons and three Demon Skeletons would attack you as you made your way further in. You would reach a small red room to the north which had a chest inside a stone room with a locked door. Questing in Tibia was never easy, but this would feel particularly galling after finally solving the wall puzzle.
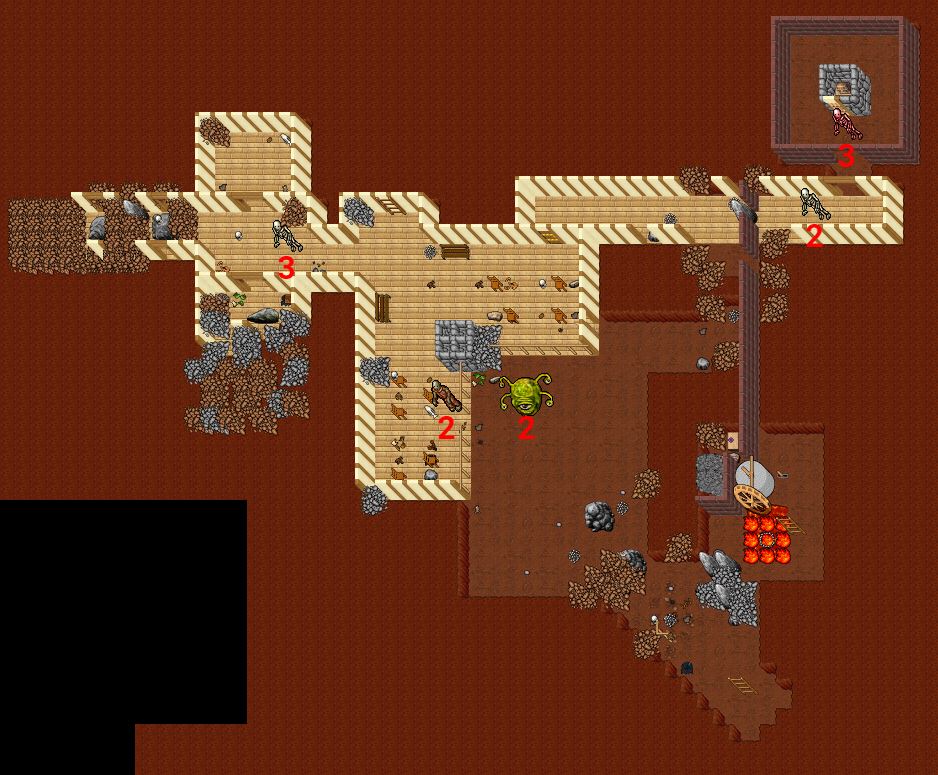
The key to this door required you find key 3303 which was inside a dead tree south of the Outlaw Castle guild hall. You would now have to find the drop-down hole hidden under some trees to the east of the observation tower. This would lead you down a dirt path with some Rats and Wild Warrior who guarded four ladders leading to four small rooms below. Going down the northwest ladder led to a locked door with a switch which you could open with key 3303. Flipping this switch moved an oven in the room directly south which allowed you to access the chest behind it with had key 3304.
This key opened the door to the chest you found which if you were the first person after a map reset, would provide you with a very rare or unique Horned Helmet. It was a mighty prize for those who first solved this quest, and anyone who did deserved this prized item. Every map reset you would have to race to PoH, push a barrel like a marathon runner to the rope up spot, jump down the point of no return, past the GS, chuck a Power Ring onto the mechanism, rope and place the barrel, and run through the Cyclops tunnel to flick the switch to trigger the wall and again run back to the barrel and loot the helmet before another took it. For this reason, it was recommended that at least two people helped so one could hit the switch and the other could loot the rewards. This was a lot of work so many players chose the easier rares which required less time and only one person.